

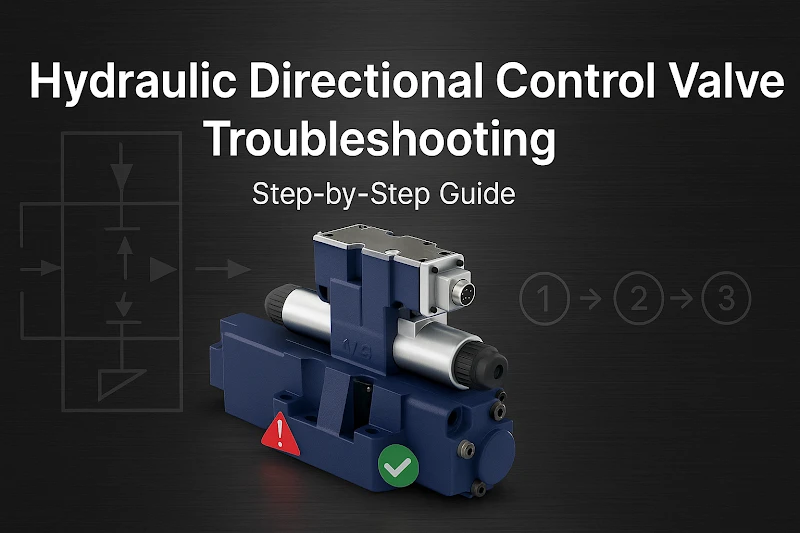
You can troubleshoot a hydraulic directional control valve by checking symptoms first, then testing electrical connections, verifying pressure, and examining internal components for contamination or wear.
7-Step Troubleshooting Process
Here’s how to systematically diagnose directional valve problems without wasting time on unnecessary repairs.
| Critical safety warning: Hydraulic systems operate at extremely high pressures (2000-5000+ PSI). Always relieve system pressure completely and lock out power before working on hydraulic valves. Hydraulic injection injuries can be fatal; never use your hands to check for leaks. |
Step 1: Listen And Look For Obvious Problems
Start with your ears and eyes before grabbing any tools. Listen for hissing sounds that indicate external leaks, grinding noises from worn internal parts, or knocking sounds from cavitation.
Check the reservoir’s fluid levels and condition. If it’s dirty, black, or milky, contamination is probably your main problem. Low fluid causes aeration and erratic movement.
Step 2: Check The Electrical Side First
Most “valve failures” are actually electrical problems, which are much easier to fix. Grab your multimeter and check both voltage and resistance at the solenoid terminals. Look for the voltage rating stamped on the solenoid body – usually 24V DC or 110V AC.
Check your readings against manufacturer specifications, not just for voltage presence but for proper resistance values. A solenoid can have voltage but still have a failed coil. Modern machines also won’t let valves operate if safety conditions aren’t met, and they’ll usually display an error message explaining why.
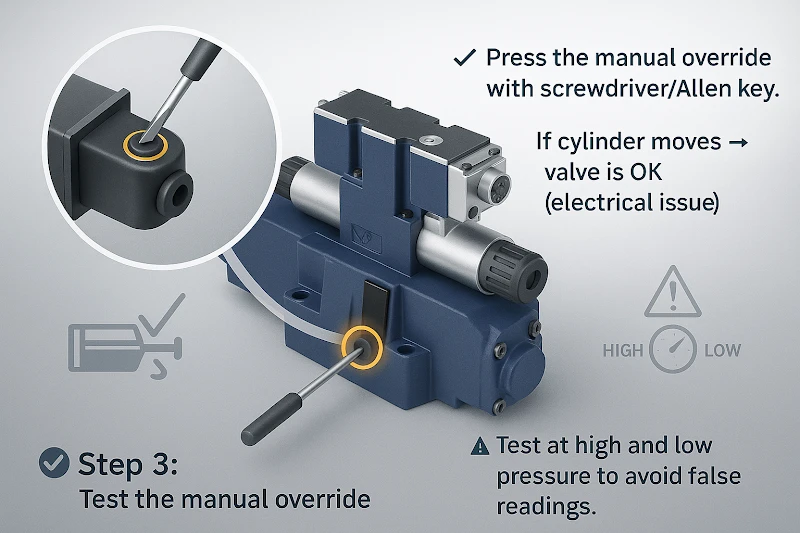
Step 3: Test The Manual Override
Here’s where you separate electrical problems from mechanical ones. Every solenoid valve has a small button you can press with a screwdriver or Allen wrench. If you press it and the cylinder moves normally, your valve is fine, and it’s an electrical problem.
Important: Test this at both high and low pressure settings if your system has them. A partially blocked valve might work at high pressure but fail at low pressure, giving you a false “good” reading.
Step 4: Check System Pressure And Flow
Don’t blame the valve if your whole system is low on pressure. Use pressure gauges simultaneously at both the inlet and outlet ports of the directional control valve to measure pressure drop across the valve during operation.
If system pressure is low overall, your problem is upstream – probably the pump or relief valve. A significant pressure drop across the valve, even when actuated, indicates internal blockage or excessive wear.
Test with the valve in different positions. A good valve should have minimal pressure drop when fully open and should maintain system pressure when in the blocked center position.
Step 5: Look For Internal Contamination
This is where things get messy. You’ll need to completely relieve all system pressure and remove the valve for inspection. Look for dirt, metal particles, varnish buildup, or gummy deposits on the spool and in the valve body bore.
Clean everything thoroughly with an appropriate cleaning solvent. Check the spool and bore for scoring, burrs, or wear marks. If the spool moves freely after cleaning and you don’t see significant wear, reassemble with new seals using the manufacturer’s specified torque values.
Important: If contamination caused the failure, identify the source. Check when filters were last changed, examine fluid condition, and look for signs of component wear that could be generating metal particles.

Step 6: Test And Verify The Fix
After cleaning or replacing parts, test the valve before putting everything back together. Hydraulic control valve troubleshooting isn’t complete until you verify the repair worked.
Start with low pressure and work your way up. Check that the cylinder moves smoothly in both directions and stops cleanly when commanded.
Monitor the system for a few cycles to make sure the problem doesn’t come back immediately. If it does, you missed something or there’s a bigger system problem.
Step 7: Find And Fix The Root Cause
Here’s the step most people skip, which is why they keep having the same problems. If contamination caused the failure, where did it come from?
Check your filters and fluid condition. If valves keep overheating, your cooling system probably needs attention. One customer kept calling about stuck valves until we discovered their hydraulic cooler was plugged with debris – the oil was getting so hot it turned gummy overnight.
Advanced Diagnostics
Sometimes basic troubleshooting isn’t enough. Here are additional tests for stubborn problems.
Cylinder drift test: Command the cylinder to a specific mid-stroke position and shut off power to the valve. If the cylinder drifts from position, it indicates internal leakage either in the directional control valve or within the cylinder seals themselves.
Pressure decay test: Monitor system pressure with a gauge over a set time period (typically 10-15 minutes). An unacceptable pressure drop indicates excessive internal leakage requiring valve replacement.
Temperature monitoring: A system that runs hot without heavy loads often indicates internal leakage. Pressurized fluid bypassing within valves creates heat, and excessive heat destroys seals, making the problem progressively worse.
Consider pneumatic directional control valves for applications where hydraulic maintenance is becoming problematic. They’re often more reliable in dirty environments and operate at much lower pressures. Doing so means you can bypass hydraulic directional control valve troubleshooting problems and get your desired result.
Frequently Asked Questions
How To Tell If A Directional Valve Is Bad?
The valve shows symptoms: slow or jerky movement, complete lack of response, or cylinders that drift when stationary. External leaks and unusual noises are clear indicators. Start with manual override testing to separate electrical from mechanical problems.
How Do I Know If My Hydraulic Control Valve Is Bad?
Test voltage and resistance with a multimeter first – wrong readings indicate electrical problems. Then test manual override. If the button won’t press or nothing happens, valve mechanics have failed. Always check system pressure before blaming the valve.
What Are The Problems With Directional Valves?
Contaminated fluid causes most failures by damaging internal parts and causing sticking. Electrical problems like failed coils are second most common. Overheating makes oil gummy, sticking valve spools. Poor maintenance accelerates all these problems.
How To Test A Hydraulic Directional Valve?
Start with multimeter testing for voltage and resistance against specifications. Use manual override to test mechanical function. Check pressure simultaneously at inlet and outlet ports. Test at different pressure settings since worn valves may work at high pressure only.
At GOWIN Industrial Valve, our hydraulic control valve expertise helps facilities solve valve problems through systematic troubleshooting and quality replacement components.
Remember: most valve “failures” are actually system problems. Fix the root cause or you’ll be troubleshooting the same issue again next week.


 CHINA
CHINA LIBERIA
 FRANCE
 BARBADOS
 KIRIBATI

